|
|
|
Porsche, and the Porsche crest are registered trademarks of Dr. Ing. h.c. F. Porsche AG.
This site is not affiliated with Porsche in any way. Its only purpose is to provide an online forum for car enthusiasts. All other trademarks are property of their respective owners. |
|
|


| Mikey914 |
 Nov 14 2016, 01:53 AM Nov 14 2016, 01:53 AM
Post
#1
|
|
The rubber man  Group: Members Posts: 12,670 Joined: 27-December 04 From: Hillsboro, OR Member No.: 3,348 Region Association: None |
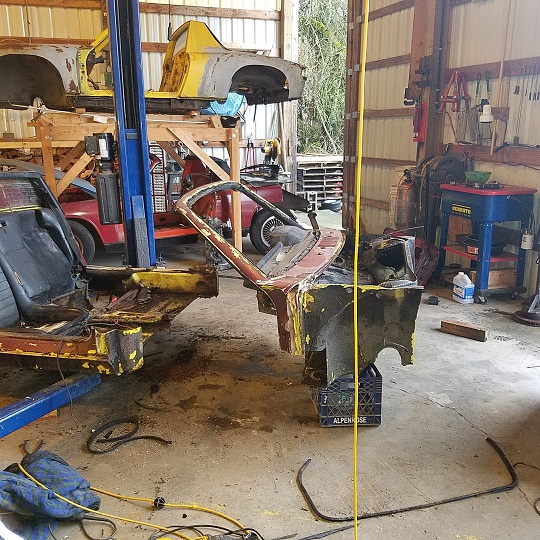
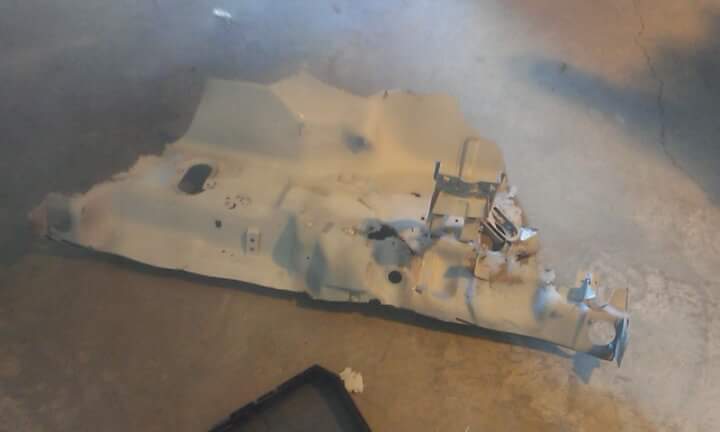
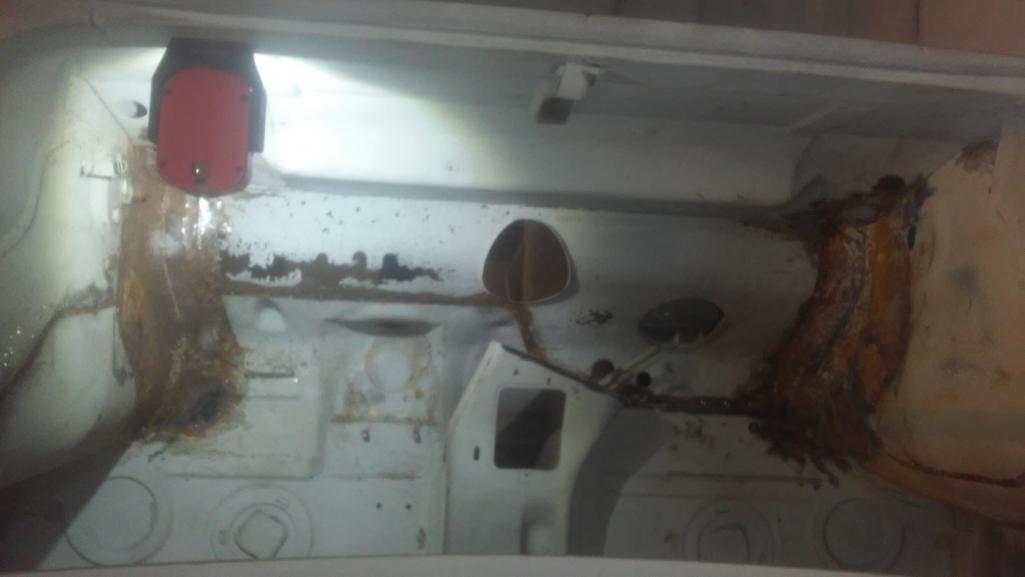
Wes was nice enough to hook Taylor up with a roller project. He drove down to Mendocino to get it about 3 weeks ago. We finally have it in a place we can work on it and started the clean up.
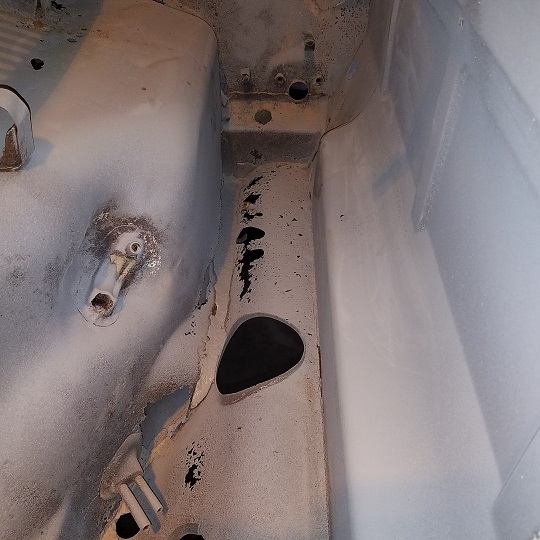
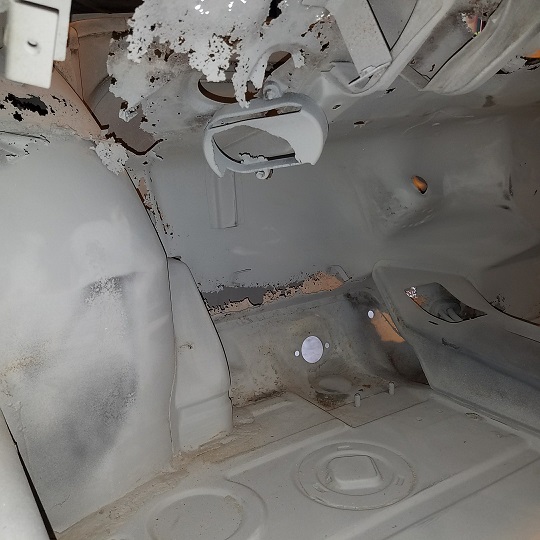
The backstory is that Wes got it in Oakland where it had sat behind a rib joint for some time. Apparently, some rodents made a home in the air box. They also acquired a taste for ribs. It appears the brought a few back with them. They were there for some time, and urinated eating the bulkhead out. The hell hole and floorboards look good. The pan is intact and looks good. He has a bunch of work ahead of him, but it will get restored back to stock ivory white. Attached thumbnail(s) 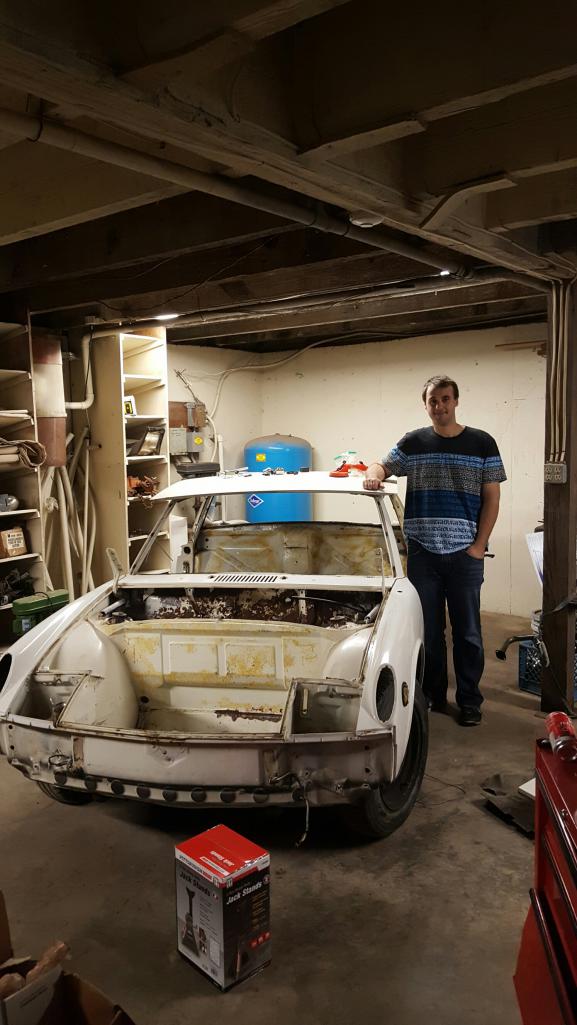 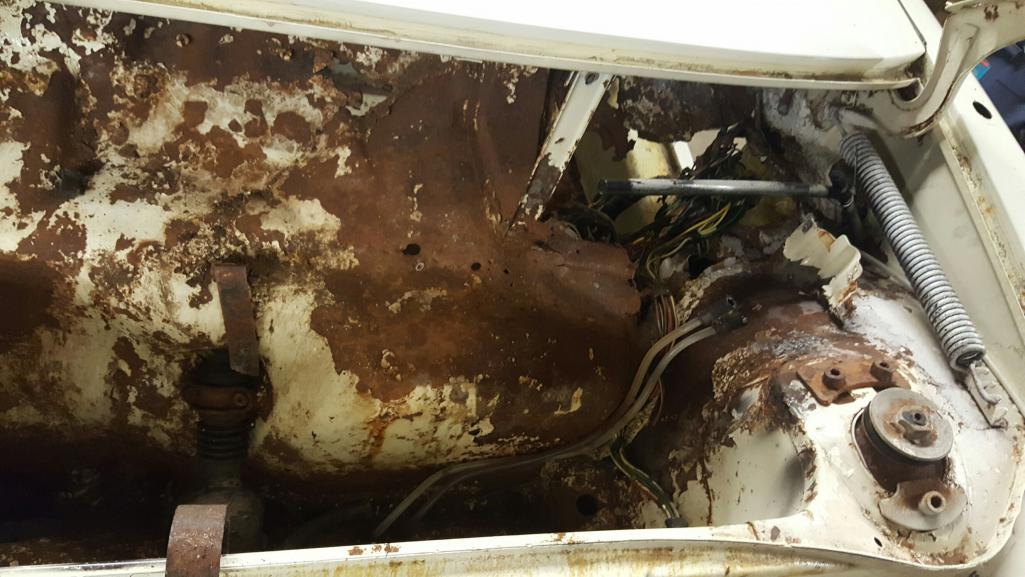 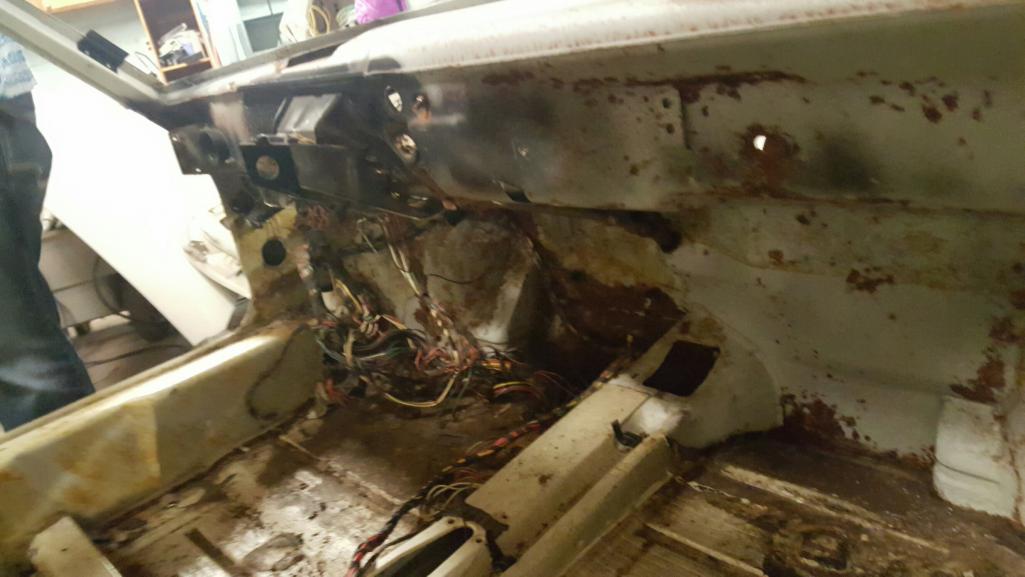
|
   |

 
|
  |
Replies(20 - 39)
| cary |
Feb 27 2017, 08:24 PM
Post
#21
|
|
Advanced Member Group: Members Posts: 3,900 Joined: 26-January 04 From: Sherwood Oregon Member No.: 1,608 Region Association: Pacific Northwest |
Lookn good ..........................
Hope to cut out your gas tank/firewall portion this weekend. |
|
|
|
| Mikey914 |
Mar 1 2017, 12:48 AM
Post
#22
|
|
The rubber man Group: Members Posts: 12,670 Joined: 27-December 04 From: Hillsboro, OR Member No.: 3,348 Region Association: None |
A few more
Attached thumbnail(s)   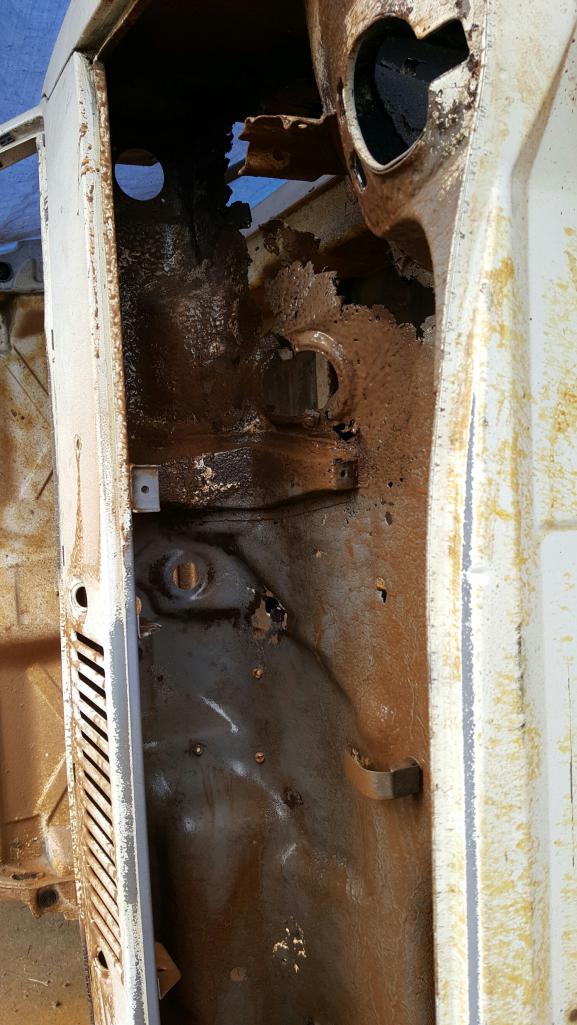
|
|
|
|
| Mikey914 |
Mar 1 2017, 12:50 AM
Post
#23
|
|
The rubber man Group: Members Posts: 12,670 Joined: 27-December 04 From: Hillsboro, OR Member No.: 3,348 Region Association: None |
more
Attached thumbnail(s) 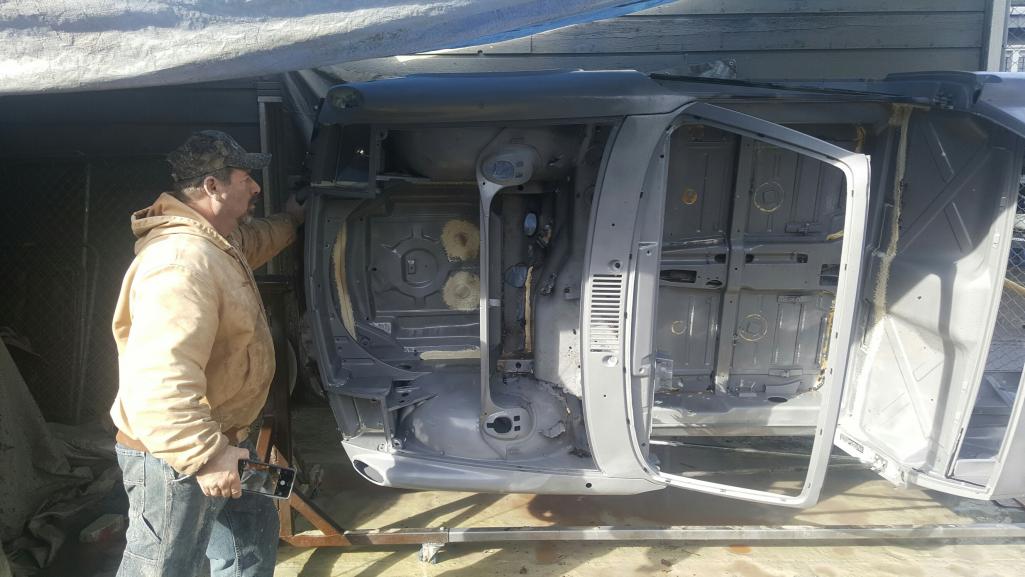 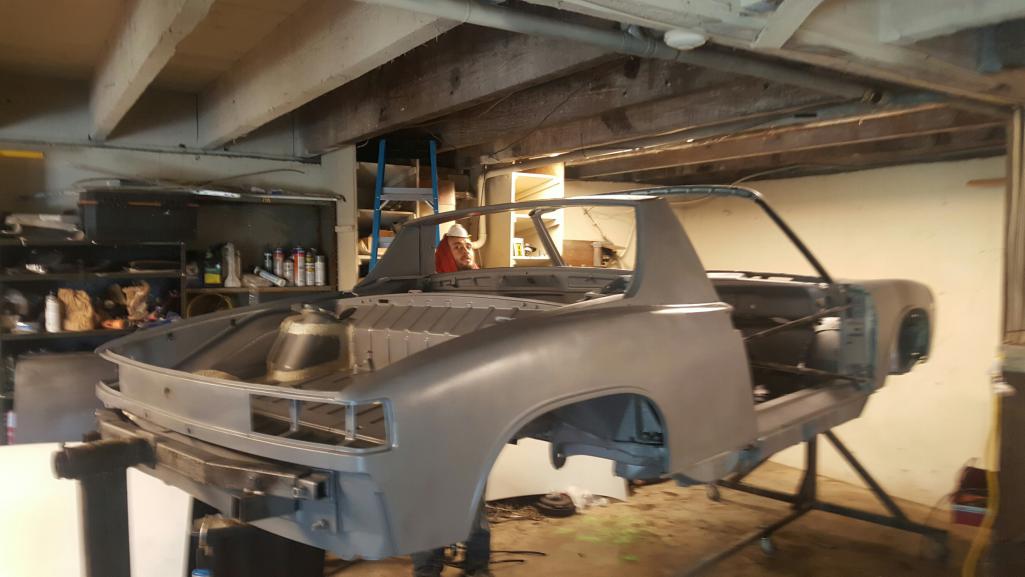  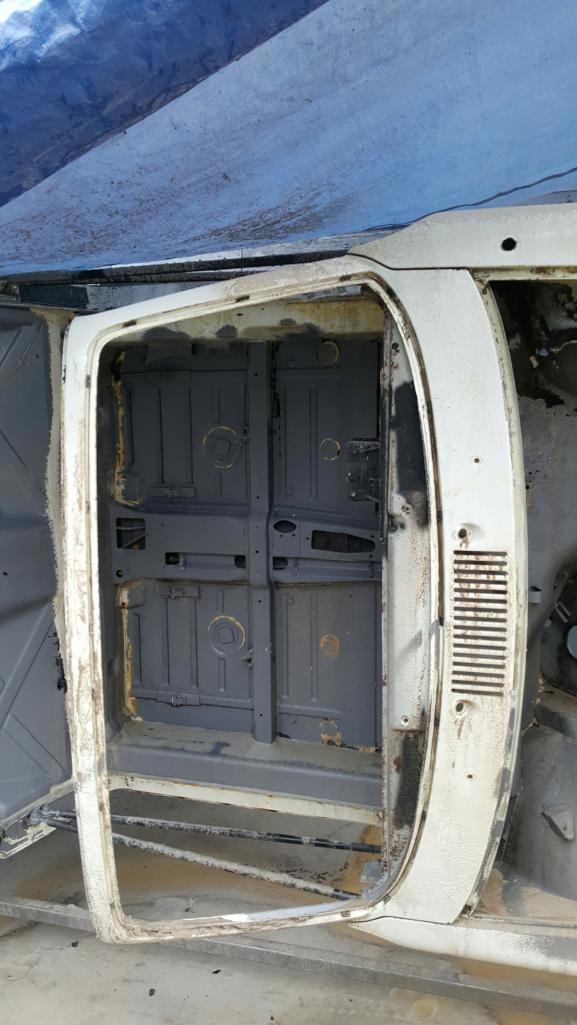
|
|
|
|
| cary |
Mar 4 2017, 10:28 PM
Post
#24
|
|
Advanced Member Group: Members Posts: 3,900 Joined: 26-January 04 From: Sherwood Oregon Member No.: 1,608 Region Association: Pacific Northwest |
(IMG:style_emoticons/default/sawzall-smiley.gif) (IMG:style_emoticons/default/sawzall-smiley.gif) (IMG:style_emoticons/default/sawzall-smiley.gif)
 Still need to pull the steering column and windshield frame. |
|
|
|
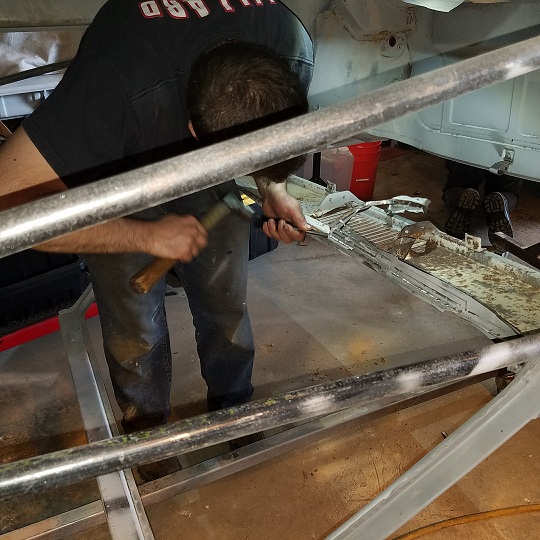
| Taylor.914 |
Apr 29 2017, 09:31 PM
Post
#25
|
|
Newbie Group: Members Posts: 22 Joined: 18-January 17 From: Hillsboro oregon Member No.: 20,761 Region Association: Pacific Northwest |
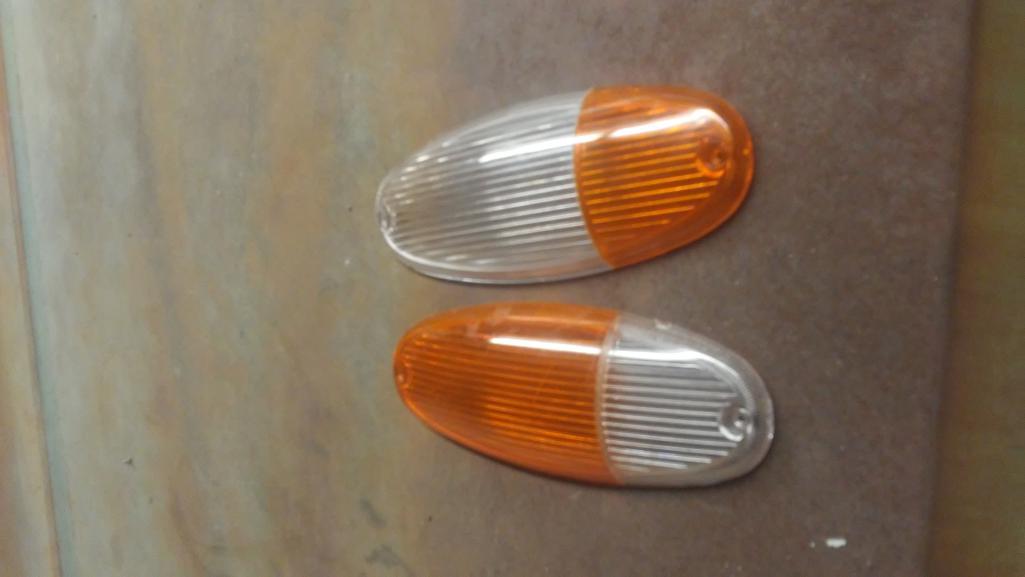
Here is the up date. Had a bit of a sawzall party and made some custom turn signal lenses.
  |
|
|
|
| Taylor.914 |
Apr 29 2017, 09:32 PM
Post
#26
|
|
Newbie Group: Members Posts: 22 Joined: 18-January 17 From: Hillsboro oregon Member No.: 20,761 Region Association: Pacific Northwest |
 |
|
|
|
| porschetub |
Apr 30 2017, 04:09 PM
Post
#27
|
|
Advanced Member Group: Members Posts: 4,701 Joined: 25-July 15 From: New Zealand Member No.: 18,995 Region Association: None |
Wow clean looking tub,dam those rats that's a hard area to repair,but I know you guys will get there with a bit of (IMG:style_emoticons/default/sawzall-smiley.gif) and a (IMG:style_emoticons/default/welder.gif) keep up the good work (IMG:style_emoticons/default/beerchug.gif) .
|
|
|
|
| wes |
Apr 30 2017, 10:08 PM
Post
#28
|
|
wes Group: Members Posts: 1,588 Joined: 8-December 07 From: Ukiah Ca Member No.: 8,436 Region Association: Northern California |
Looking good really glad to see her coming back to life, looks like this will be a good one in the end.
|
|
|
|
| cary |
Jun 16 2017, 10:16 PM
Post
#29
|
|
Advanced Member Group: Members Posts: 3,900 Joined: 26-January 04 From: Sherwood Oregon Member No.: 1,608 Region Association: Pacific Northwest |
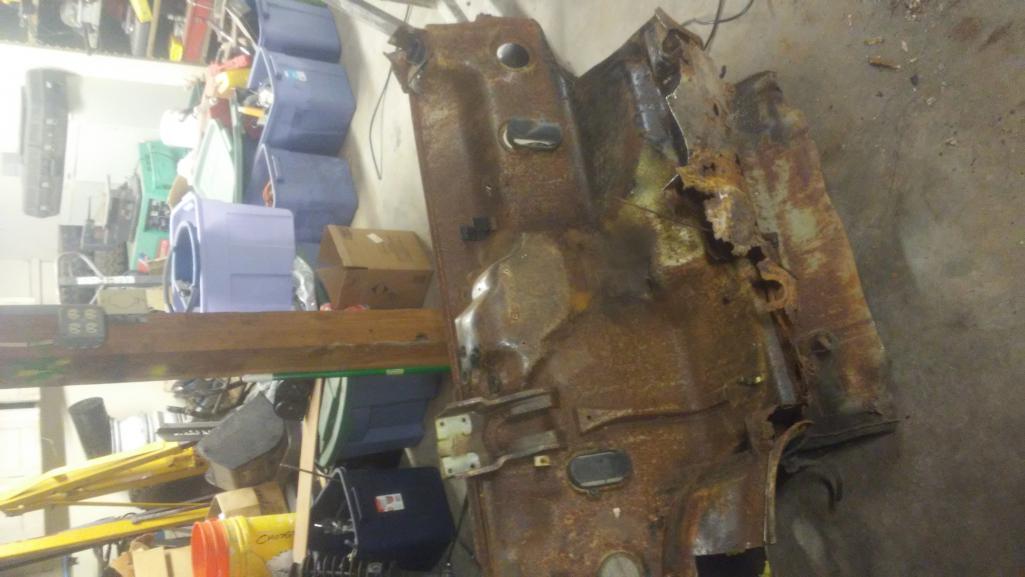
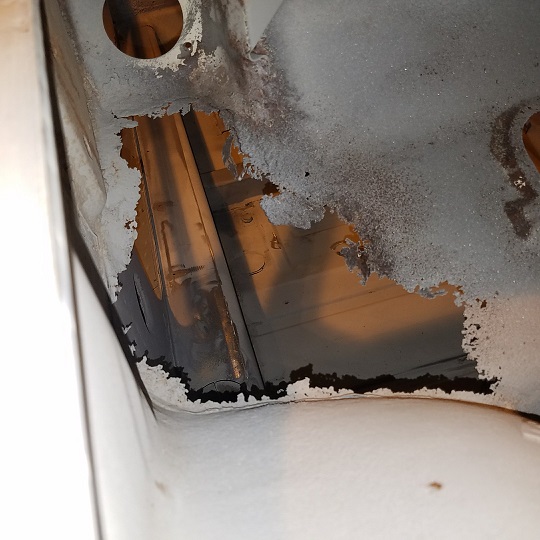
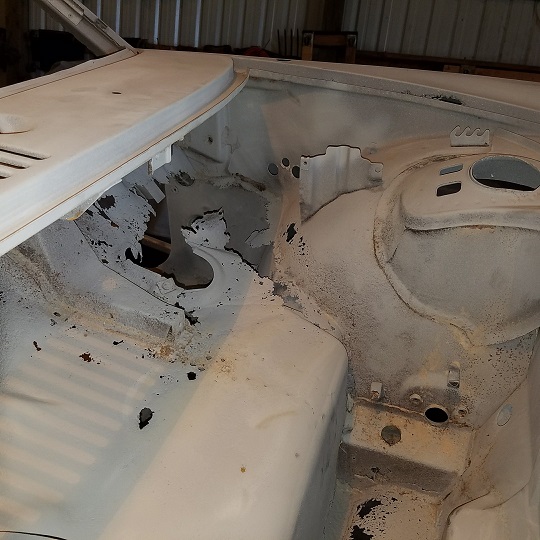
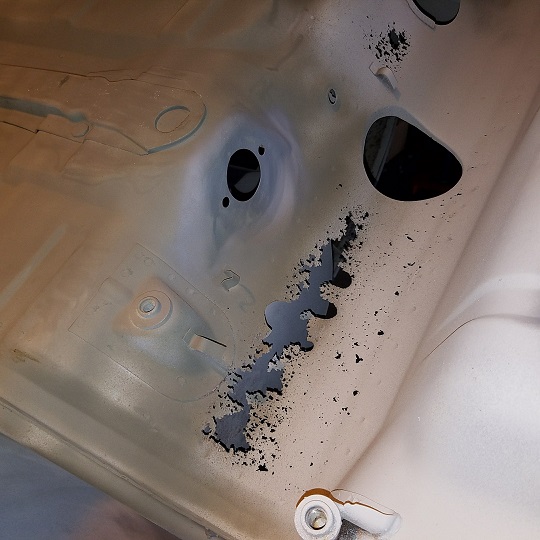
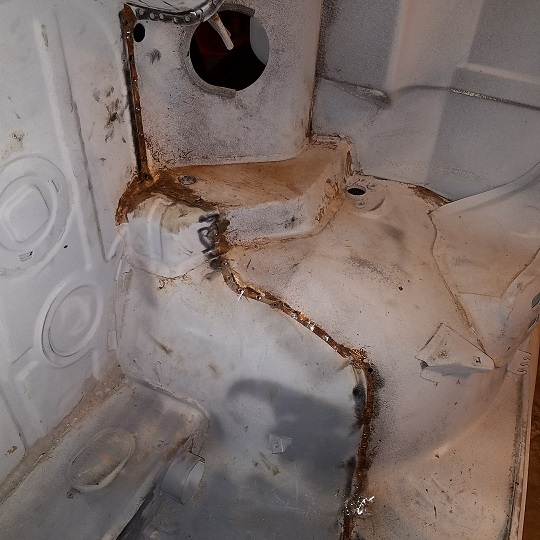
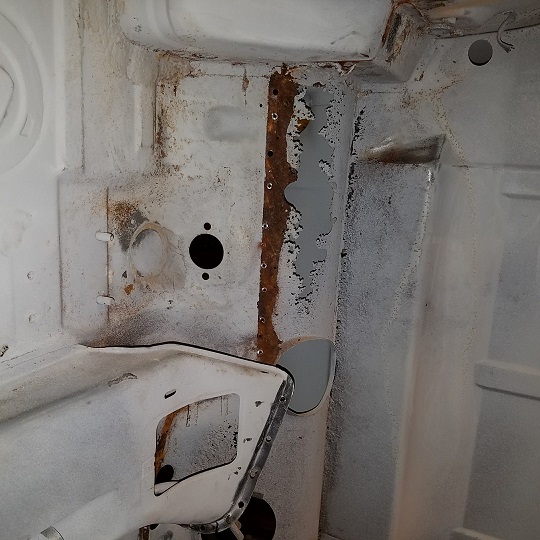
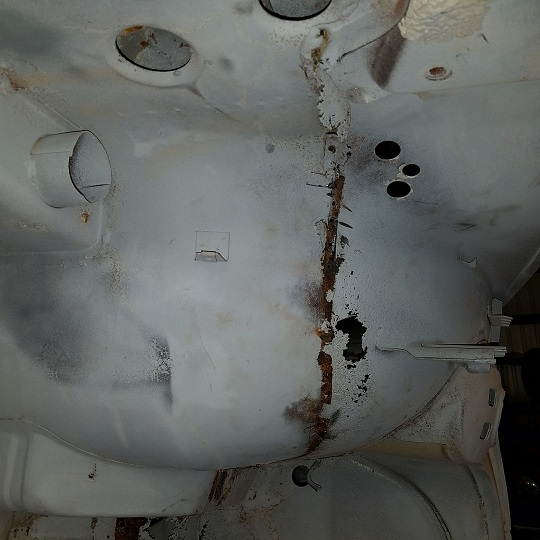
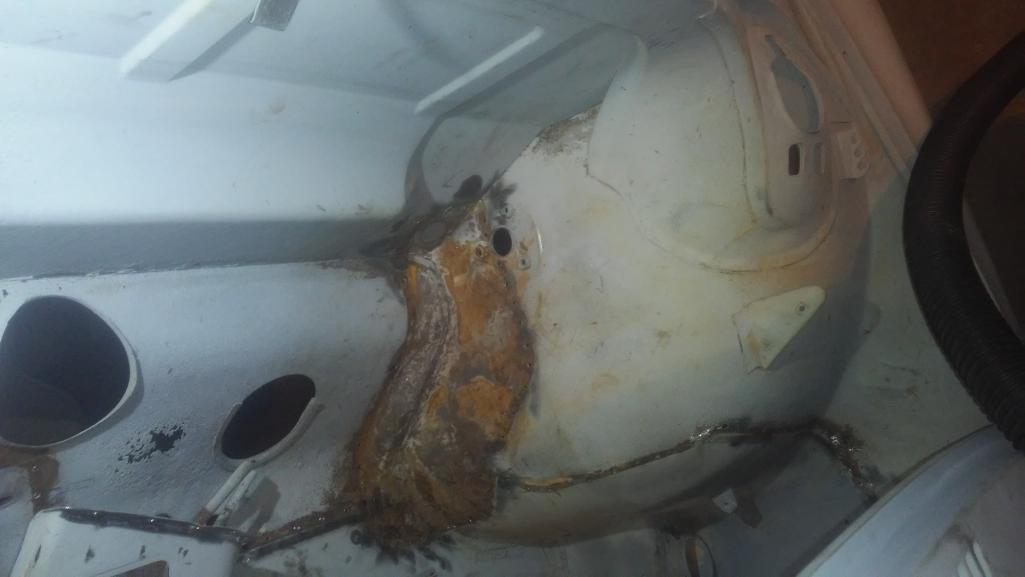
Taylor's project arrived at MiddleMotors this am. It came in style, on a flatbed tow truck. Here's some close ups of the areas that will need some work. It's a shame this really is a pretty good tub. It will need a right suspension ear (early battery acid). It will need a patch in the right engine firewall right behind the passenger (soggy engine sound mat). Doesn't seem to be any cosmetic body damage. But the rat damage is pretty severe.
     This is going to be a tag team effort with Taylor and I. By the time we get this thing ready for paint he'll an accomplished welder and spot weld remover. (IMG:style_emoticons/default/sawzall-smiley.gif) (IMG:style_emoticons/default/welder.gif) Project starts tomorrow at 10am. I plan to arrive around 9am and get the center field section of the front firewall and dash marked out so Taylor can saw away. Super In Law is going to take and mark down all the X Y Z measurements that might come into play. We discussed welding in a brace between the longs. I'm thinking maybe one between the front shock towers. Here's right suspension ear. SOP. 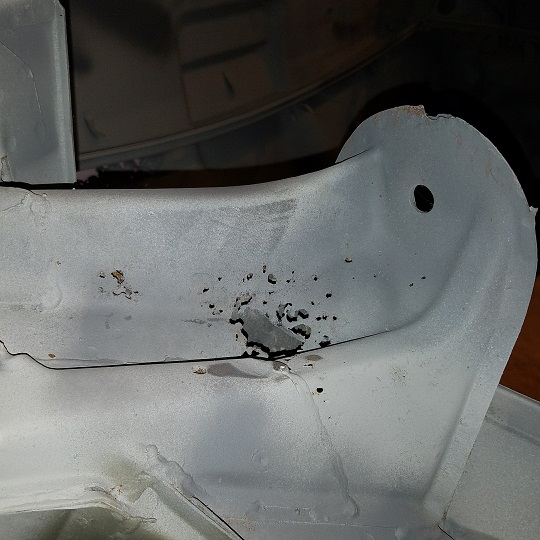 It is on a rotisserie so that makes things a little easier. I can hear the nay sayers already. Crush It. I'm up for the challenge. Taylor's eager to learn. Lets see how things look after we get the majority on the field sawed out tomorrow. What does it look like behind the spot welds? |
|
|
|
| Larmo63 |
Jun 16 2017, 10:25 PM
Post
#30
|
|
Advanced Member Group: Members Posts: 4,264 Joined: 3-March 14 From: San Clemente, Ca Member No.: 17,068 Region Association: Southern California |
Keep at it, that looks like a good body/chassis from the outside (at least)
|
|
|
|
| Taylor.914 |
Jun 17 2017, 07:22 PM
Post
#31
|
|
Newbie Group: Members Posts: 22 Joined: 18-January 17 From: Hillsboro oregon Member No.: 20,761 Region Association: Pacific Northwest |
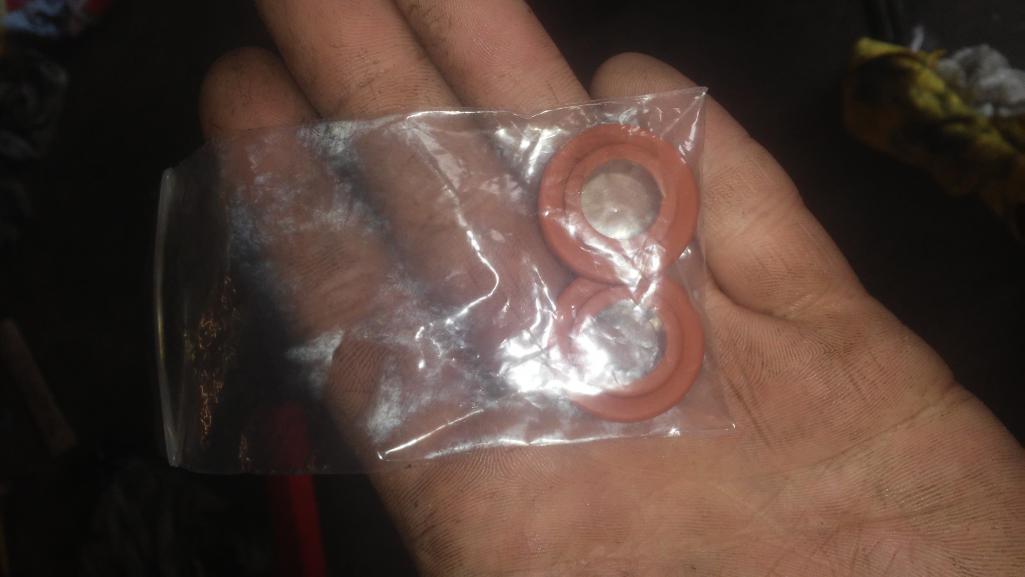
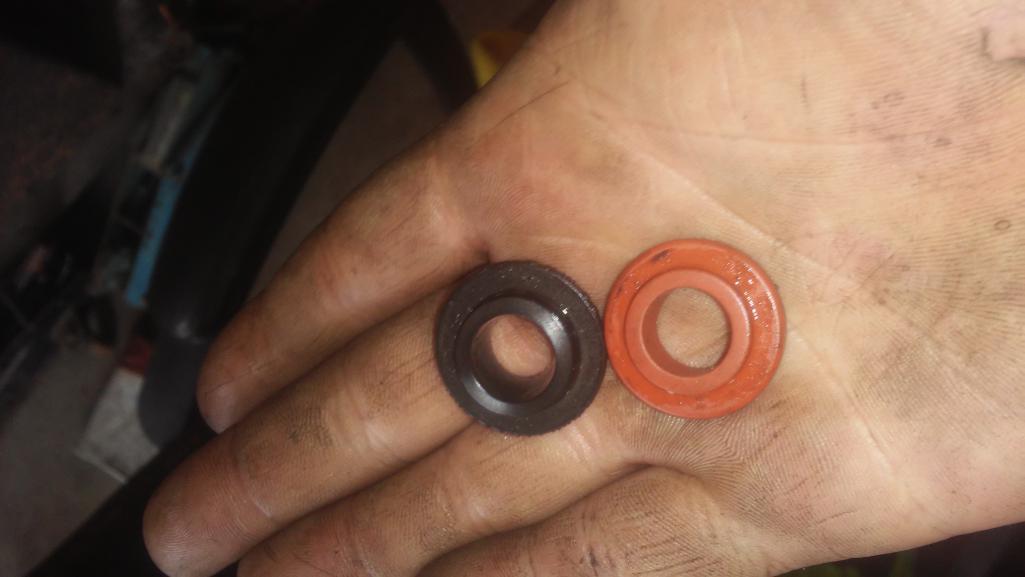
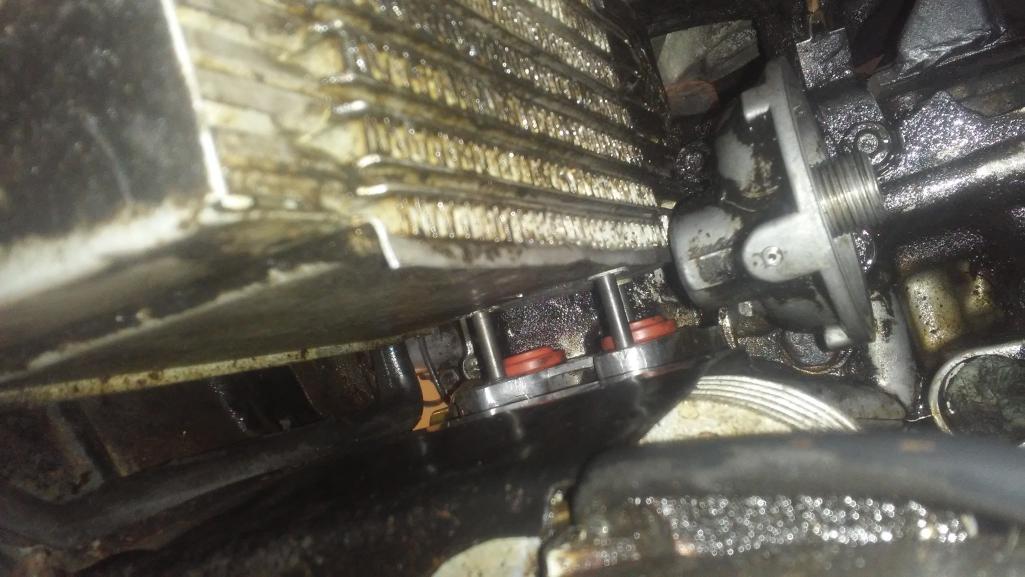
Back at it cutting out the rust and drilling spot welds. Also took some time to clean up the engine and replaced the leaky oil cooler seals with new ones from 914 Rubber.
  |
|
|
|
| Taylor.914 |
Jun 17 2017, 07:25 PM
Post
#32
|
|
Newbie Group: Members Posts: 22 Joined: 18-January 17 From: Hillsboro oregon Member No.: 20,761 Region Association: Pacific Northwest |
   Attached thumbnail(s) 
|
|
|
|
| cary |
Jun 18 2017, 06:34 AM
Post
#33
|
|
Advanced Member Group: Members Posts: 3,900 Joined: 26-January 04 From: Sherwood Oregon Member No.: 1,608 Region Association: Pacific Northwest |
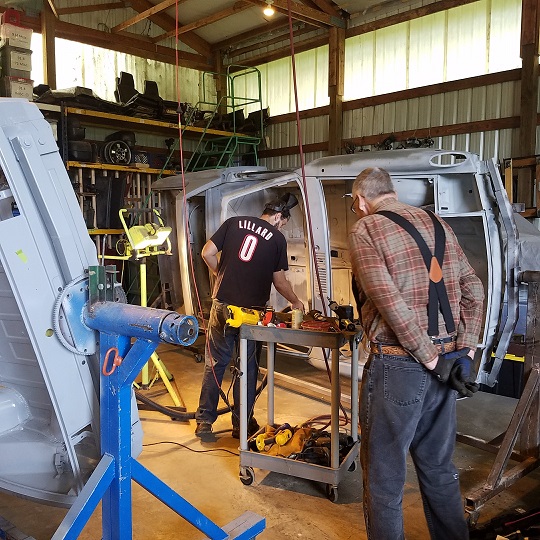
A couple more shots from yesterday. Taylor had a great day. Got him lined out and and away he went. Gave him a couple coaching sessions on using Rick's grind and peeling spot weld removal technique. He's getting a good feel on what the metal is telling him.
  |
|
|
|
| Garland |
Jun 18 2017, 06:57 AM
Post
#34
|
|
Restoration Fanatic Group: Members Posts: 1,329 Joined: 8-January 04 From: ......Michigan...... Member No.: 1,535 Region Association: Upper MidWest |
Taylor,
Welcome to the path that leads to the road of 914 freedom, and the day of its first drive. Good looking project, and Light Ivory is a great color! |
|
|
|
| cary |
Jun 30 2017, 10:27 PM
Post
#35
|
|
Advanced Member Group: Members Posts: 3,900 Joined: 26-January 04 From: Sherwood Oregon Member No.: 1,608 Region Association: Pacific Northwest |
Back to work on Taylor's project.
1st. Cut off the nose ................ 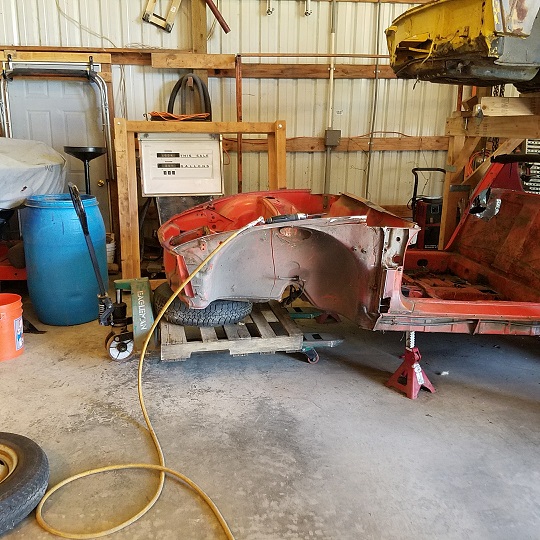 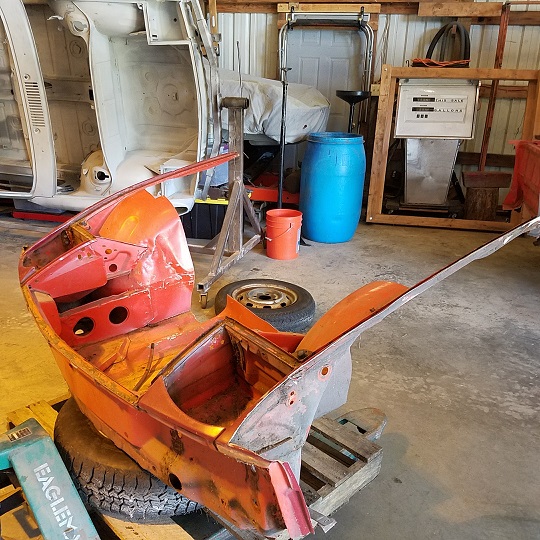 Pretty much junk ............. You can see the wrinkle on the right side. When time allows we'll trim some other pieces off. The seal channels are nice. #2. Off came the needed section. As Taylor is drilling out spot welds on the car tomorrow. I'll ponder how much we're going to use. 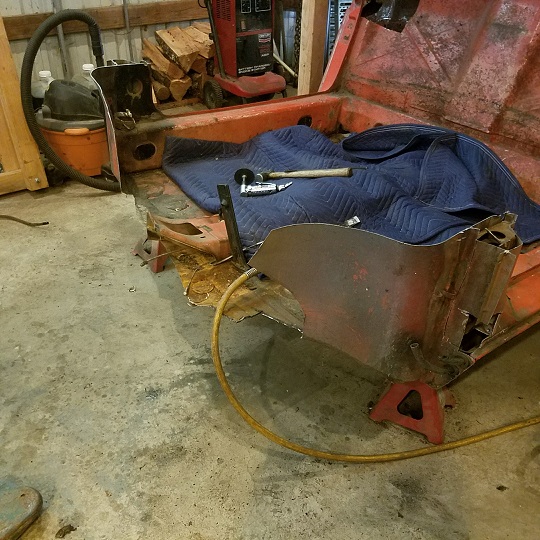 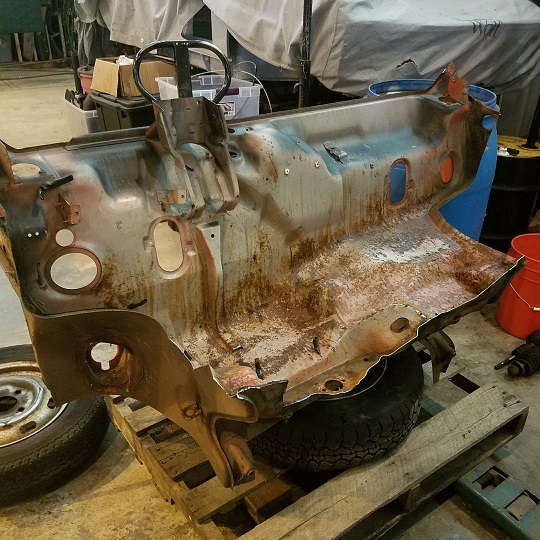 #3. Drilled out the center tunnel so it can be saved in it entirety. (IMG:style_emoticons/default/biggrin.gif) 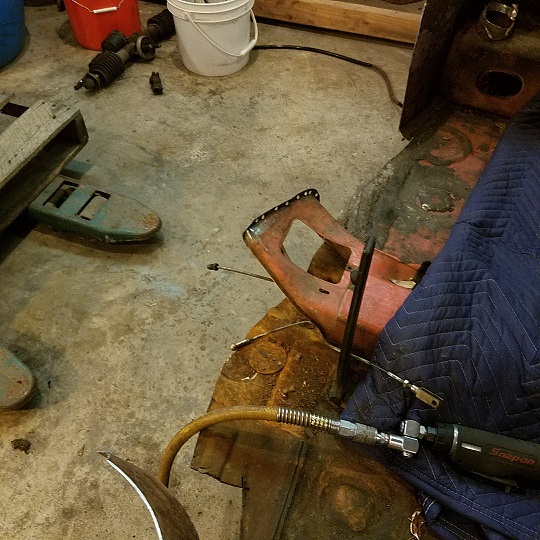 |
|
|
|
| 914Sixer |
Jul 1 2017, 06:51 AM
Post
#36
|
|
914 Guru Group: Members Posts: 8,886 Joined: 17-January 05 From: San Angelo Texas Member No.: 3,457 Region Association: Southwest Region |
I have never seen rust in half those places.
|
|
|
|
| cary |
Jul 1 2017, 07:58 AM
Post
#37
|
|
Advanced Member Group: Members Posts: 3,900 Joined: 26-January 04 From: Sherwood Oregon Member No.: 1,608 Region Association: Pacific Northwest |
Today I'll get Taylor set up removing the trimmed off spot weld flanges inside the project car. Slow tedious work .......................
Looking at it again yesterday it looks like we'll replace the lower 1/2 of the fuel tank/strut support wall. Still pondering the upper inner fender portion. Will the remaining portion of the dash have to come out to get it in ? |
|
|
|
| Mikey914 |
Jul 1 2017, 11:12 AM
Post
#38
|
|
The rubber man Group: Members Posts: 12,670 Joined: 27-December 04 From: Hillsboro, OR Member No.: 3,348 Region Association: None |
QUOTE(914Sixer @ Jul 1 2017, 05:51 AM)  I have never seen rust in half those places. Rats made a nest in the air box and over time the urine ate the metal. Fortunately, as you mentioned most cars do not have rust here so lots of options for donor parts. Way to go Taylor keep plugging away! I know you'll have 150 hours + into this, but I hope we can paint it this late summer so you can assemble this winter. Who knows WCR next year??? |
|
|
|
| cary |
Jul 1 2017, 08:52 PM
Post
#39
|
|
Advanced Member Group: Members Posts: 3,900 Joined: 26-January 04 From: Sherwood Oregon Member No.: 1,608 Region Association: Pacific Northwest |
Taylor had a very productive day. He got most of the spot welds cut out side to side under the dash on the project car. (IMG:style_emoticons/default/biggrin.gif)
   Very impressed. He has a good handle on the Rotabroach spot weld cutter. |
|
|
|
| Taylor.914 |
Jul 8 2017, 07:55 PM
Post
#40
|
|
Newbie Group: Members Posts: 22 Joined: 18-January 17 From: Hillsboro oregon Member No.: 20,761 Region Association: Pacific Northwest |
Weekend update. Finished drilling the welds and removing metal on my car for now. Moved in to scraping the seam sealer cleaning the meatal and began to drill away on the donor.
  |
|
|
|
|
1 User(s) are reading this topic (1 Guests and 0 Anonymous Users)
0 Members:

|
Lo-Fi Version | Time is now: 20th May 2024 - 11:09 AM |
Invision Power Board
v9.1.4 © 2024 IPS, Inc.